Monday, January 28, 2013

Happy Accidents Stew

Michelle Berkowitz, on the Fuhrman forums, posted this recipe back in October (Sorry, but the link will only work if you're a paying member of the forums), and I've been planning to make it but never got around to it.


Happy Accidents Stew

64 oz jug of Odwalla carrot juice
64 oz water
2 chopped onions (raw or water sautéed)
2 C Bob's Red Mill Vegi Mix
1 C black rice
32 oz jar crushed tomatoes no salt added (Eden brand is good)
Bag of sun-dried tomatoes
 Head of chopped cauliflower
2 heaping T sweet curry powder

Water sauté the onions for a few minutes, then dump all the other ingredients into a large pot.
Turn to boiling, lower to a simmer and let cook for one hour.

Before serving, stir a bag of frozen chopped spinach into the pot.

Oh, my! This practically filled my big 8 quart pressure cooker pot! At least after an hour of simmering the level went down a bit, thickening the stew nicely. We'll have plenty for tonight's dinner (with seconds?) and lunch for the weekend. I just have to find freezer or fridge room.

My changes:
I used 2, 32-ounce bottles of Lakewood carrot juice because that seems to be the only carrot juice in this entire city.

I did water sauté the onions.

Having no idea what size "bag" of tomatoes Michelle was referring to, so I just used 2 cups from the quart-sized container that I keep in the fridge and cut each tomato half in half or quarters, depending on its size.

Instead of black rice I used a cup of Lundberg Countrywild rice blend, which does include black rice.

A box of Pomi brand chopped tomatoes instead of canned  crushed.

A bag of frozen cauliflower and about 2 cups of frozen spinach instead of fresh.

Yeah, my husband will appreciate this more that some baked potatoes, gravy and veggies for dinner, especially now that he's coming home in sleet and freezing rain. 

And I better keep an apron handy to wear while eating it. I'm such a slob and carrot juice is a horror to wash out of clothes, especially "natural cotton" t-shirt material.

Friday, January 25, 2013

Now for Some Gentle Exercise

With my degenerative disc disease and cervical neuritis, as well as plantar fasciitis and a multitude of other musculo-skeletal problems, I really can't do full impact aerobics. Both my primary care doc and podiatrist said exercise like qigong and tai chi are perfect for me, and I have a number of DVD's from Lee Holden and his mother Karen and Robert Bates, DC that I enjoy doing.

This one is one of my favorites from Lee: Qi Gong for Weight Loss:
 

from his mother Karen: Exercise to Heal: Get Stronger:


and this is the first video from Dr. Bates: Fun With Qigong: The Five Flows


Sometimes even those are too much for my back and I have to do yoga, instead. This video from Sally Pugh, Expanding into Fullness, Yoga for Large Women, does quite nicely in stretching the body without doing any more damage:


And when things are going well and I have no back or foot pains, I can then return to my favorite exercise instructors,  Leslie Sansone


and my first exercise love, Richard Simmons.


And Richard has announced he's releasing 10 new videos any day now - I can't wait! I may not be able to do all the steps with this 59 year old body, but I do try. The results are usually  more hysterical than Richard's get-ups!


Wednesday, January 23, 2013

Hominy Casserole and Tomato Vegetable Pot Soup

No photos today, because the pictures Letha put on her blog to go along with her casserole recipe are much better than any of mine will ever be.

It's just coincidental that there's currently a thread on hominy on the "mothership," as Letha used to call the official McDougall forums, but I've had my menus made up months ahead of time (I have through March already written out right now) and tonight's dinner is going to be this casserole of Letha's.

With my husband having to do hours of mandatory overtime every week from December through February and maybe beyond, I want easy recipes that won't go bad if they have to stay simmering an extra hour or so if the trains are behind schedule. Jeff's SNAP recipes fit the bill, and I made one of his yesterday for dinner, my version of his Cream of Kitchen Stew, tossing in all the drips and drabs of frozen veggies floating around the freezer, like half cup of corn, 3/4 cup peas, half bag of kale, etc. I think I had 6 different veggies in there by the time I was done. Unlike how Jeff makes them, toss and heat and ready in 10 minutes, I like my veggies softer, and I love to start these SNAPs in the heavy pot that comes with the pressure cooker and let them simmer for a few hours with the glass lid, not the pressure cooker mechanism. Toss a few herbs and spices in after hubby walks in the door and a nice hot meal is ready for him. With the outside temps in the teens when he gets in, he really appreciated it.

Tonight is Letha's Hominy Casserole, and as I said, her blog post about it does more justice than I ever could. Go see it for yourself. She may not be McDougalling any more or updating the blog, but many of us are thankful she didn't delete it because there's a lot of good recipes and information there.

My changes:

  • a box of Pomi chopped tomatoes instead of a can of diced
  • a large onion instead of medium
  • frozen green beans instead of canned
  • a little bit of green pepper as well as the red, only because I had some left over from the other day when I made Black Bean Sloppy Joes. It was a BIG pepper!


To go along with that casserole I'll also make Dr. Fuhrman's Tomato Vegetable Pot Soup. I thought I already did a blog post about this but it doesn't come up in a search, so I guess not.


Tomato Vegetable Pot Soup

6 cups water
4 tablespoons lentils
1 teaspoon basil
1 teaspoon thyme
1 teaspoon oregano
2 tablespoons Dr. Fuhrman's VegiZest
3 garlic cloves, chopped
8 tomatoes, chopped
1 broccoli stalk, chopped
2 onions, chopped
4 potatoes, chopped
1 pound carrots, chopped
1 cup green beans, chopped
1 cup cabbage, chopped
1 organic celery stalk, chopped


My changes:

  • 2 boxes Pomi chopped tomatoes instead of 8 fresh tomatoes
  • about twice the about of cabbage (Okay, maybe a bit more)
  • frozen sliced green beans instead of fresh; ditto the broccoli
  • gotta toss in some of those shiitaki mushrooms I got Sunday. Not so much that they change the taste of the soup, but enough to satisfy Dr. Fuhrman's daily G-BOMBS recommendation. 
Between the 2 dishes we'll fill our tummies and get nice and warm so when the wind-chill hits the negative numbers overnight we'll be able to sleep right through them comfortably. I'll also have plenty of leftovers for lunches. Nice!


Tuesday, January 22, 2013

Black Bean Sloppy Joes


Sandwiches for dinner on Monday. We had a busy afternoon, finally having enough energy to take down the Christmas tree and put all the decorations away. After that we both dozed off while watching an old Vincent Price/Agnes Moorehead movie. Good thing I already planned for this quickie meal, because I really didn't feel like cooking up a big dinner. 


The recipe is by Mary McDougall and comes from a number of published sources, most recently in the McDougall Quick and Easy Cookbook.


Black Bean Sloppy Joes
Servings: 6
Preparation Time: 10 minutes
Cooking Time: 10 minutes

  1                     onion -- chopped
  1                     green bell pepper -- diced
     1/3           cup  water
  15            ounces  canned black beans -- drained and rinsed
  8             ounces  tomato sauce
     1/4           cup  rolled oats -- quick-cooking
  1         tablespoon  soy sauce
     1/2    tablespoon  prepared mustard
  1           teaspoon  honey
  1           teaspoon  chili powder
  6                     whole wheat buns -- *see Note

Place the onion and bell pepper in a saucepan with the water. Cook, stirring frequently, until the vegetables soften, about 5 minutes.
Meanwhile, mash the beans with a bean or potato masher (do not use a food processor). Add the beans and remaining ingredients, except the buns. Cook over low heat until heated through, about 5 minutes.
Serve on the buns with your choice of accompaniments, such as onions, tomatoes, lettuce, pickles, mustard, and ketchup.
Recipe Hint: Try this over toast, potatoes, or grains. Canned pinto beans also work well in this recipe.
McDougall Quick and Easy Cookbook
page 134

Oatmeal? Sounds like a weird ingredient to put into sloppy joes. Also, only 1 can of beans and such a small amount of sauce. This will never be enough for 6 sandwiches, right?


In a medium sized saucepan

Wrong. The oatmeal made this a thick mixture, not a watery, sloppy, one, and added a bit of volume, too. With regular sloppy joes, you have a lot of sauce with the little bits (veggies, lentils, etc.) swimming around in it. To get enough bits onto your sandwich you had to ladle on a pretty large amount. With this mixture, everything is in a nice neat package so one smaller scoop is all you need.
On Kaiser rolls

I had to quickly take the photo. My husband already started eating one of his sandwiches while my back was turned (upper left corner). Since he ate my whole wheat Kaiser roll for his breakfast earlier in the day, I wound up having mine on the same whole grain panini bread I raved on about in previous posts. Look at how nice and neat it sits there on the bread!
Piled around a half inch high

Another comment I can make about this sloppy joe recipe is that the flavor is a bit bland. Kids, and other people who don't go for highly spiced food (like me), will love it! My husband liked the texture but wanted it spicier (especially after eating leftover Lazy Sunday Stew for lunch) so shook on some sriracha sauce, but I loved it just the way it was. 

We got 5 hearty sandwiches out of it. It's hard to see in these photos but those babies were piled up high! My husband ate 3 on kaiser rolls, I had one on the bread, and I have another sandwich already made in the refrigerator for today's lunch. I really scooped a lot on each one, so this could easily make 6 or more sandwiches with less on each one. So much for one can of beans not being enough.

Monday, January 21, 2013

The Agony of Lunchtime

Another day my husband is home for lunch. I'm glad he's no longer eating those turkey hot dogs or cheese sandwiches, but he looks for a bit more than the veggies and rice I usually make for lunch when I'm by myself. I also need something quick enough to make so we can be busy doing things all morning and when lunch time rolls around I can whip something up fast.

Pasta is pretty good for that, especially if I put a pot of water on the stove on low a half hour or more before under the guise of humidifying the apartment.


I'll be trying a new to me recipe today, Chef AJ's Spicy Peanut Noodles with Broccoli from her book, Unprocessed:


Chef A.J.'s Spicy Peanut Noodles with Broccoli
1 pound brown rice noodles (spaghetti or linguine)
1 pound broccoli florets
3/4 cup peanut butter, unsweetened and unsalted
3/4 cup water
1/4 cup rice vinegar
2 Tbsp low sodium tamari
2 Tbsp date syrup
2 cloves garlic, pressed
1/4-1/2 ounce piece of fresh ginger, pressed
1/2 tsp red pepper flakes
8 scallions, thinly sliced on the diagonal
Sesame seeds or chopped unsalted peanuts for garnish (optional)

To make the date paste: soak 1/4 pound of dates in 1/4 cup of water for several hours until much of the liquid is absorbed (you can do this overnight). In a food processor fitted with the s blade (I used my mini Cuisinart), process dates and liquid until completely smooth. Store extra date paste in the refrigerator.
Cook pasta according to directions on package. Run under cold water when done. Drain and place in a large bowl.
Blanch broccoli and run under cold water when done. Drain and add to pasta bowl along with the scallions.
To make the sauce, combine peanut butter, water, rice vinegar, tamari, date syrup, garlic, ginger and red pepper flakes in a saucepan over medium-high heat. Whisk until smooth and cook for about 10 minutes until thickened, turning heat down to low if necessary to prevent overheating. Pour dressing over noodles and broccoli and thoroughly combine. Chill until it becomes cold.

While looking around for the recipe on-line to link to, I noticed that this recipe is also out there by the name of Thai Noodles, and she and Julianna Hever demonstrate its making in this "live" episode of the Chef and the Dietitian Show:


Then I started to look over the recipe a bit more closely and popped the peanut butter into one of those nutrition calculators. Wanna see what I got for JUST the peanut butter?
Nutrition Facts
Serving Size 3/4 cup
Amount Per Serving
Calories from Fat 878
Calories 1138
% Daily Values*
Total Fat 97.5g 150%
Saturated Fat 19.915g 100%
Polyunsaturated Fat 26.833g
Monounsaturated Fat 45.885g
Cholesterol 0mg 0%
Sodium 888mg 37%
Potassium 1256mg
Total Carbohydrate 37.85g 13%
Dietary Fiber 11.6g 46%
Sugars 17.84g
Protein 48.55g
Vitamin A 0% Vitamin C 0%
Calcium 8% Iron 20%
* Percent Daily Values are based on a 2000 calorie diet. Your daily values may be higher or lower depending on your calorie needs.

Nutrition Values are based on USDA Nutrient Database SR18      
Yikes! I didn't specify no salt, but that wouldn't affect the fat and protein counts, anyway. And this isn't counting the optional garnish of chopped nuts or sesame seeds!

Now you see why Doctor McDougall is so anti-nuts and why Chef AJ herself lost a good chunk of weight as soon as she greatly reduced the amount of nuts she ate.

Maybe I'll just skip this recipe.

Perhaps it's kismet that the grocery store had a great sale on russet potatoes yesterday - 2 5-pound bags for $3.50. I wasn't going to buy any, because none of the meals I had planned for the upcoming week required more of that type of potato than I already had in the house, and I hate to stock up because this place is so hot potatoes go bad rapidly, but my husband said for that price we can afford to lose a few to the heat, to grab them anyway.

A new item the produce department got in was cleaned and packaged shiitake and cremini mushrooms. Once in a blue moon that had those varieties, but only loose and lousy looking and pretty expensive. These were in the same weight packages as the buttons and for the same price, so I grabbed 2 of each. I only needed one package of mushrooms for this week's menus, but I could always cook them up in a skillet and freeze them. 

So why did I mention kismet above? Because now instead of the fatty (but delicious looking) noodle dish I can make some mashed or baked potatoes with mushroom gravy for today's lunch.

There's been a lot of discussions on the official McDougall forums the past few days about the McDougall Made Easy DVD, and kismet again, my favorite mushroom gravy recipe comes from that disc in Lesson 13

Lesson 13: Mashed Potatoes & Gravy and Baked Potatoes
MUSHROOM GRAVY
Preparation Time: 10 minutes
Cooking Time: 15 minutes
Servings: Makes 2 ½ cups
1 onion, finely chopped
½ pound mushrooms, sliced
2 ¼ cups cold water
2 tablespoons soy sauce
3 tablespoons cornstarch
Place the onions and mushrooms in a pan with ¼ cup water. Cook and stir until very soft, about 5 minutes. Mix the remaining water with the soy sauce and cornstarch. Add to the pan and cook, stirring constantly until mixture boils and thickens.
RECIPE HINT: Seasonings may also be added, such as parsley flakes, oregano, thyme or basil.
And of course, the potato recipe, too: 
MASHED POTATOES
Russet potatoes make fluffier mashed potatoes, while Yukon Gold, Yellow Finn and other golden potatoes have a buttery flavor when mashed. Thin-skinned red or white potatoes are denser and heavier in texture, and I usually mash these with the skins on. 
Three pounds of potatoes will yield approximately 6-8 servings. Peel, simmer over low heat until tender, and mash, blending with warmed soy milk. (Or save some of the cooking water and use that to moisten the potatoes.) Add salt and pepper to taste. I like to mash my potatoes using a hand-held electric mixer. Don’t use a food processor to mash potatoes - the potatoes turn into a starchy paste within seconds.
Variations on basic mashed potatoes:
1) For garlic mashed potatoes, cook six peeled cloves of garlic with the potatoes.
2) For roasted garlic mashed potatoes, cut the top off one head of garlic, drizzle 1 tablespoon vegetable broth over cut portion, wrap in parchment paper, then tightly wrap in aluminum foil. Bake at 400 degrees for about 45 minutes. Cool. Remove from wrapping, invert over bowl, and squeeze garlic out of the cloves. Add to potatoes while mashing.
3) For colorful mashed potatoes, add cooked vegetables while mashing. Try carrots, sweet potatoes, turnips, kale or spinach (well drained), broccoli, or celery root.
4) For herbed mashed potatoes, add fresh chopped herbs after the potatoes are mashed.
Try parsley, dill, chives, cilantro, basil, or another of your favorites.
5) For green onion mashed potatoes, add one cup of chopped green onions to soy milk while heating, then add to potatoes while mashing.
6) For spicier potatoes, add one to two tablespoons of spicy brown mustard while mashing, or try two tablespoons of prepared wasabi.
 Mashed and gravy sounds like a good January lunch and will be quick enough to make after we get in from the little bit of shopping we have to do this morning. And I'll have the leftovers for my lunches for the rest of the week, too. So it'll take a little longer than the noodle dish - it won't kill him to wait a little longer, but it may kill him (and me) if I made what I originally planned!

(Edited to add: Hubby wound up eating leftover Lazy Sunday Stew and I ate a salad.)

Sunday, January 20, 2013

Lazy Sunday Stew

We're all still suffering with the winter cold/flu in this house, and besides soup, the next best thing to getting those sinuses draining is a nice spicy chili. But because I used up all my energy at the grocery store then making that tofu lunch, I wanted something easy to toss together for dinner, something I can just pop on the stove on low on top of the flame tamer and forget about for a while, maybe even take a short nap and not worry about anything burning. This stew fits the bill.

The recipe, cut and paste from the original post to my cardfile and then here:


Lazy Sunday Stew
I come up with lots of recipes on the weekend, when it’s fun to experiment with what you have in the pantry. I just love this easy to throw together all-in-one meal. Kids and grown ups alike enjoy the potatoes added to what resembles a kind of mild chili.

1 bag frozen hash brown potatoes (try ore-Ida, check labels)
2 14 oz. tomato sauce
1 can water
1 big can kidney beans (or 2 14 oz. cans)
1 can black beans, rinsed and drained (optional)
1 cup frozen corn
5 oz. or about 1 cup frozen spinach
3 Tbls. Chili powder
2 Tbls. cumin powder
1 Tbls. garlic powder
1 Tbls. vinegar (opt.)
3-4 green onions, chopped (opt.)
salt to taste

Combine all in a big pot and heat until the potatoes are tender and all flavors are blended.


Jill Ovnick
June 7, 2010
http://www.foodforlife.me/FFL/Recipes/Entries/2010/6/7_Lazy_Sunday_Stew.html

My changes:
None of the stores here sell no-salt added tomato sauce in cans larger than 8 ounces, so instead of opening 4 cans I just used a jar of no-salt, no-oil marinara sauce.

I'm not using the vinegar.

Those are the only changes made.

This looks like a lot of spices, but I'm hoping that after sitting on the stove a few hours they mellow out a bit. This wiped me out of all three of those spices so tomorrow I'll hit the HFS, the only place around that sells spices in bulk, and load up again. They haven't had chili powder for a while now and hope they finally got some in. If not, I'll have to buy a smaller amount at the grocery store and mail order some from Penzey's.

The apartment is starting to smell pretty nice.

Maple Glazed Tofu Ham

I found this recipe while roaming the Internet. Someone said ti resembles ham and made great "ham" sandwiches, so decided to try it today.


Maple Glazed Tofu
Submitted By: doll
Prep Time: 5 Minutes
Cook Time: 10 Minutes
Ready In: 15 Minutes
Servings: 2
"A vegetarian alternative for ham."
Ingredients:
1/2 cup maple syrup
1/2 cup pineapple juice
1 teaspoon soy sauce (optional)
2 tablespoons brown mustard
1 tablespoon olive oil
1 (8 ounce) container firm tofu, drained and cubed
1 teaspoon sesame seeds (optional)
Directions:
1. Whisk together maple syrup, pineapple juice, soy sauce, and mustard in a small bowl. Set aside.
2. Heat olive oil in a large skillet over medium-high heat and stir in the tofu. Cook and stir until the tofu is evenly browned. Stir in syrup mixture and continue to cook until the glaze has reduced. Top with sesame seeds.
Printed from Allrecipes.com 4/13/2012

My changes:
First off, I pressed a 14 ounce package of Naysoya Extra Firm tofu for about an hour.

Instead of cutting it into cubes, I cut the pressed 'fu into 8 slices.

I dry-fried them until browned in a non-stick skillet and omitted the oil.

The marinade:
I just realized I forgot the mustard. Oops! Would have made a great addition, too.

I never have pineapple juice around but just this morning bought a package of 4,1/2 cup servings of pineapple chinks with a 50 cent off coupon. It took the liquid of 2 of those cups to make 1/2 cup of pineapple juice. I tossed all the fruit bits in, too, because pineapple goes great with ham.

Everything whipped up in a very short time. The tofu took about 10 minutes to brown on both sides, then I tossed in the liquid and fruit and let it boil away for about another 10 to 15 minutes. There was still a bit of liquid left, but by then my husband was drooling at the sight of it so went ahead and served the tofu and fruit onto whole wheat Kaiser rolls then took a spoon and poured a bit of the liquid over the tofu on each sandwich. Oops, I also forgot the sesame seeds. And I had them out on the counter, too.

Sorry, no photos, because we devoured these before I remembered I wanted a shot.

We moaned with delight at the taste of them, but after the first bite or 2 both of us were doing Tigger (from Winnie the Pooh) quotes about icky, sticky stuff that's only fit for heffalumps and woozles. The mustard would have helped cut the sweetness.

Another great meal that we will do again, but next time with all the ingredients.

Wednesday, January 16, 2013

Heather McDougall's French Toast

The last time I made French Toast, my now almost-30 year old was still a picky eater toddler and I took a box of frost bitten pre-made French Toast sticks out of the freezer and ate a few while still frozen. Before I had my son it was about 20 years since I had previously had the stuff.

When my mom made the stuff it was always a special occasion, because making it was a big to-do, and when you've got three kids to get out the door in the morning, the last thing you want to do is spend a lot of time cooking a hot breakfast, then fighting with my even picker younger brother to get him to eat, and of course, the clean-up afterwards. After a few times doing this French Toast was relegated to one of those "special occasion" meals made only on someone's birthday and only for that person, if they wanted it. You can see why I hadn't had it in around 2 decades.

But this morning I have some more tastebuds and brain power back, and after finally reading the December 2012 McDougall newsletter decided THAT'S what I want for breakfast today - French Toast. I've seen dozens of other recipes for French toast, all including a dozen or more ingredients and a blender, usually a high-powered one strong enough to liquify cashew nuts, but this one just had a handful of easy to mix ingredients and required only a bowl and a whisk to make. It's not one of Mary McDougall's recipes but her daughter Heather's.

The recipe:

FRENCH TOAST
Preparation Time:  5 minutes
Cooking Time:  10 minutes
Servings:  makes 6-8 slices of toast 
1 cup non-dairy milk
1/2 cup orange juice
2 tablespoons flour
1 tablespoons sugar
1 tablespoons nutritional yeast
1/2 teaspoon cinnamon
1/4 teaspoon nutmeg
6-8 slices of bread
Mix all ingredients together with a whisk.
Preheat a non-stick skillet to medium-high.
Quickly dip bread into mixture and place on skillet for about 3 minutes each side. Repeat with remaining bread until mixture runs out. If you do not use all of the mixture, you can easily refrigerate and use another day. It will keep for about 5 days in the fridge.

Luckily, because of this cold/flu thing, I had some of the  whole wheat panini bread around, the one filled with delicious healthy seeds and made with no added oils. These are gigantic slices, like old-fashioned rye bread. Fantastic food, one that kept me going on days when I couldn't eat much else.

My changes? Well, for the first time in a while I made NO changes to a recipe. I made this as-written, and it mixed up beautifully in seconds.

While doing that, I set my non-stick griddle on the stove and turned on the gas to heat it up. When the batter was ready I did the drop of water test and yes, the water beaded up and skittered around the pan. Time to get started!

I dunked on slice of bread completely in the liquid then placed in onto the griddle and it started to sizzle immediately. The second slice quickly followed. I set a timer for 4 minutes and got out my special spatula that I use when cooking in this griddle. It's thin enough to flip stuff and actually safe for non-stick coatings. Others that claim to be safe, aren't. I do a lot of testing before using a new spatula on any of my non-stick cookware and have had to toss out way too many spatulas and pans that didn't pass the test.

Okay, timer dinged, time to flip these babies over.

But I can't get the spatula in there. The bread is fused to the non-stick coating.

Keep cool and think. I guess I'll turn the heat up a bit and let them toast up a bit more. Maybe then they'll be flippable.

Sure enough, it took a total of 7 minutes on medium-high heat before these solidified enough to allow a spatula under them without leaving half the coated bread behind. Over they went, then another 5 minutes of cooking.

The final result:


They look pretty darn good!

I already put the rest of the liquid away in a jar in the fridge because I only have 2 more slices of bread left in that package and need them for later. I have to hit the grocery store before the weekend and I'm thinking of buying a loaf of Ezekial or Alvarado Street Bakery California bread and make up a slew of slices to keep in the freezer for quick breakfasts or snacks. It may be easier using the smaller slices of bread, although I'm also tempted to make a loaf of homemade raisin bread and using that in nice thick slabs, but think that may be too decadent.

Thanks, Heaher, for another quick and easy - and tasty - recipe!

Tuesday, January 15, 2013

McDougall Bean and Corn Enchiladas

My husband and I have been passing a cold/flu back and forth since a few days after Christmas. We did the same thing last year at exactly the same time. In both years, I got it worse than him, even though he's the one bringing the germs home from work and passing them to me. This time around we had 2 different strains. This time he had a few days of coughing and sneezing, whereas I've had over a week of tsunami snot, one day with a fever, no sleep at night for 5 days because as soon as I tilt my head I leak from every opening in my head (Yes, even my ears were draining and eyes gunked up this time around).

One of the hazards of having this thing is that you can't eat. You can't stop breathing long enough to chew and swallow, so you nibble, then give up after a while because face it, the food has no taste, either, when your whole head is clogged up.

I've made very simple meals, and one day my husband cooked - the day I was feverish, and another my son did. He makes a great pot of spaghetti with jarred sauce, like any other 2-something male.

Today I woke up knowing I'm on the healing path again. I've only used one tissue all day, and some air is actually making through both nostrils. My ears no longer leak. My eyes aren't puffy. I was able to taste my morning smoothie! 


So to surprise my husband today I'm making another Mary McDougall oldie but goodie, Bean and Corn Enchiladas, using the recipe she demonstrates in the McDougall Made Easy DVD and was previously included in newsletters and at least one of the McDougall books.

The recipe:

Bean & Corn Enchiladas
Preparation Time: 40 minutes
Cooking Time: 45 minutes
Servings: 6-8

Enchilada Sauce:
2 8 ounce cans tomato sauce
3 cups water
4 tablespoons cornstarch
3 tablespoons chili powder
½ teaspoon onion powder
¼ teaspoon garlic powder

Place all ingredients for the sauce in a saucepan. Mix well with a whisk until well
combined. Cook and stir over medium heat until thickened, about 5 minutes. Taste and
add more chili powder if desired. Set aside.

10 whole wheat flour tortillas
4 cups mashed pinto beans
1 cup chopped green onions
1 ½ cups frozen corn kernels, thawed
1 2.25 ounce can sliced ripe olives, drained
1-2 tablespoons chopped green chilies (optional)
grated soy cheese (optional)

To assemble casserole:
Preheat oven to 350 degrees.
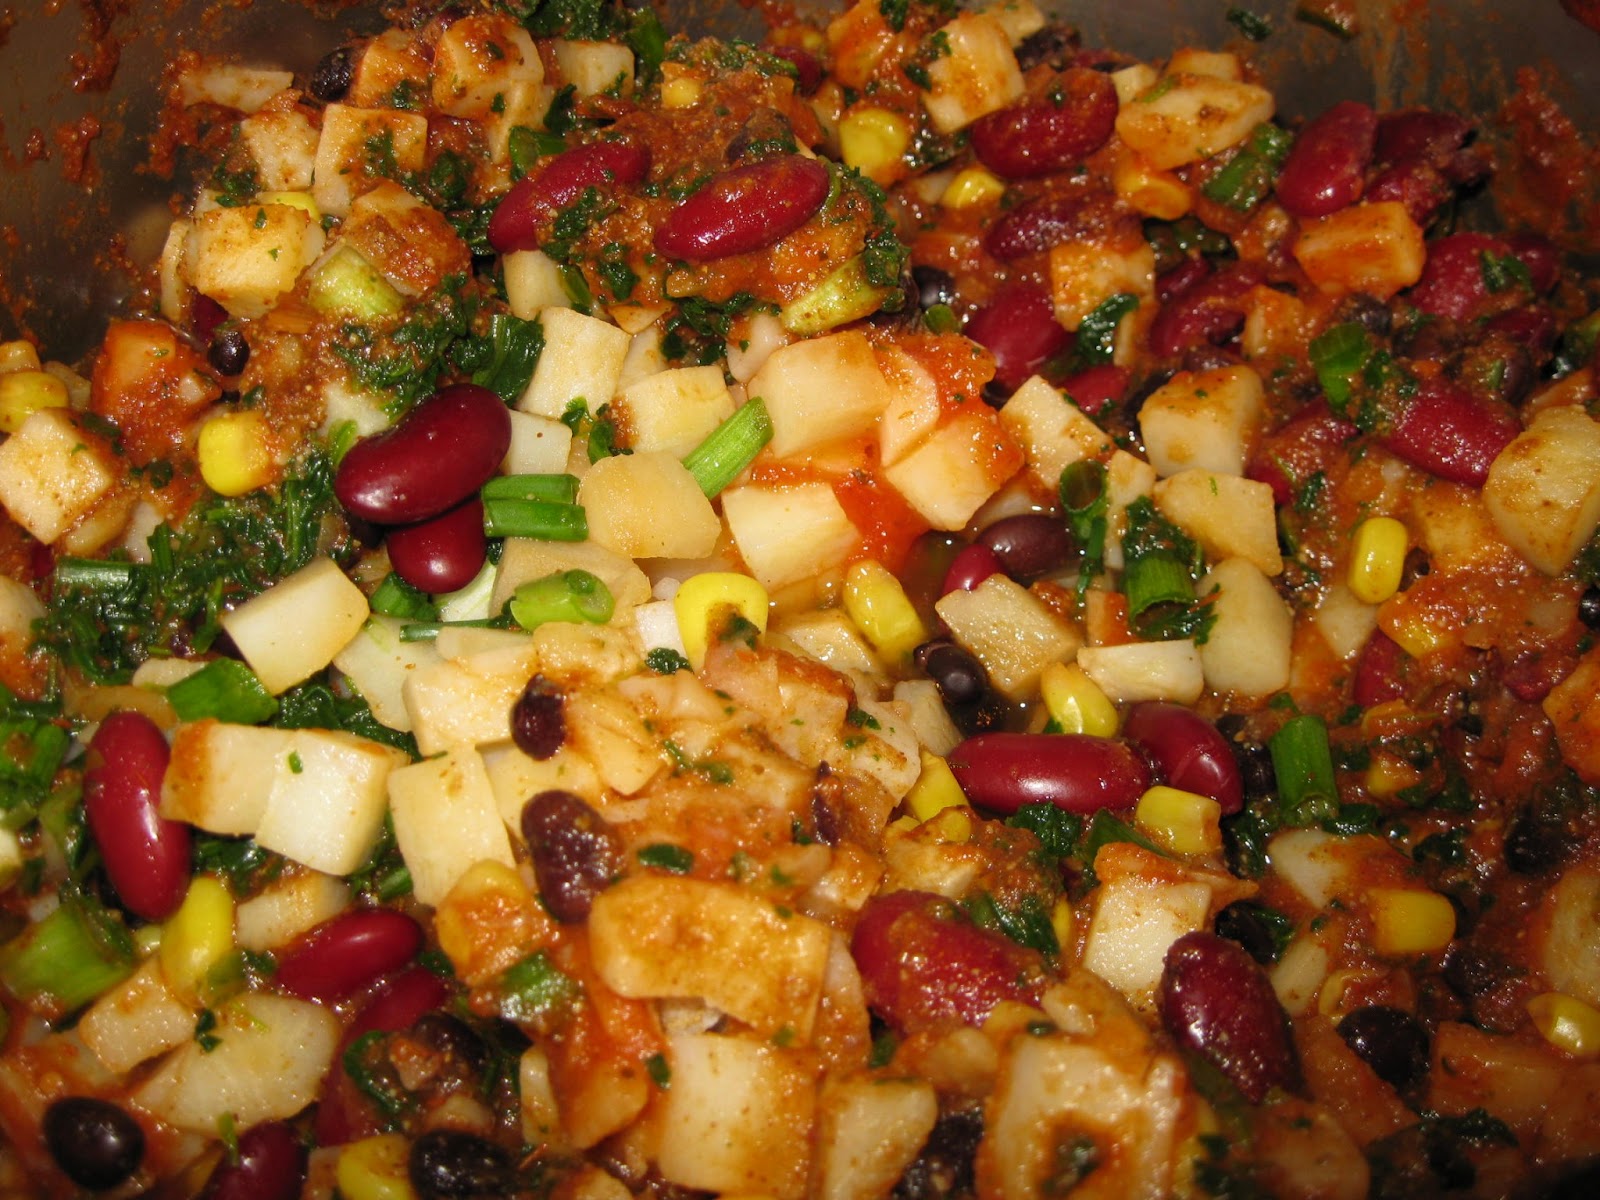
Place the beans in a large bowl. Add the onions, corn, olives and green chilies (if you
wish). Mix gently until well combined.
Place 1½ cups of the sauce in the bottom of a large non-stick oblong baking dish. Take 1
tortilla at a time and spread a line of the bean mixture down the center of the tortilla. Roll up and place seam side down in the baking dish. Repeat with remaining tortillas, placing them snugly next to each other. Pour the rest of the sauce over the rolled up tortillas, spreading it out evenly. Sprinkle a small amount of grated soy cheese over the top, if desired. Cover with parchment paper, then cover with aluminum foil, crimping the edges over the baking dish. Bake for 45 minutes. Remove from oven and let rest for about 5 minutes before cutting. Serve with salsa and tofu sour cream, if desired.
My changes:

My bag of tortillas contained 8 so that's what I make. My baking dish couldn't hold any more, anyway.

I didn't feel like standing over a stove to make the enchilada sauce, so I used plain old low salt, low sodium marinara sauce to which I added a few tablespoons of chili powder. I've done this in the past and my husband says he likes it more than "real" enchilada sauce. The recipe tastes better with the larger amount of sauce, anyway.

The recipe calls for 4 cups of beans. That's more than 2 cans, a smidgen less than 3. The heck with it, I used 2 cans and it was just fine. Other times I've gone with 2 cans of refried beans, Eden brand low sodium.

The corn - I used 2 cups, not 1 1/2 cups, only because that's what was left in the bag. We like corn.

Mary doesn't specify what kind of olives. I've done this with both black and green and my husband prefers the green with the pimentos. Since I want something with a strong taste today, I went with the green again. I can use the sodium.

I didn't use the green chilies. I don't want to open a 4-ounce can only to use a tablespoon or so, and plan nothing else this week I can use them with, so may skip them.

And I used Daiya cheddar shreds on top of this. Many years ago, Dr. McDougall had no problem with the use of soy cheeses or even soy-based meat substitutes, like Gimmelean and Boca products, and I continue to use them, although not as often as I once did. Something like this needs the cheese.

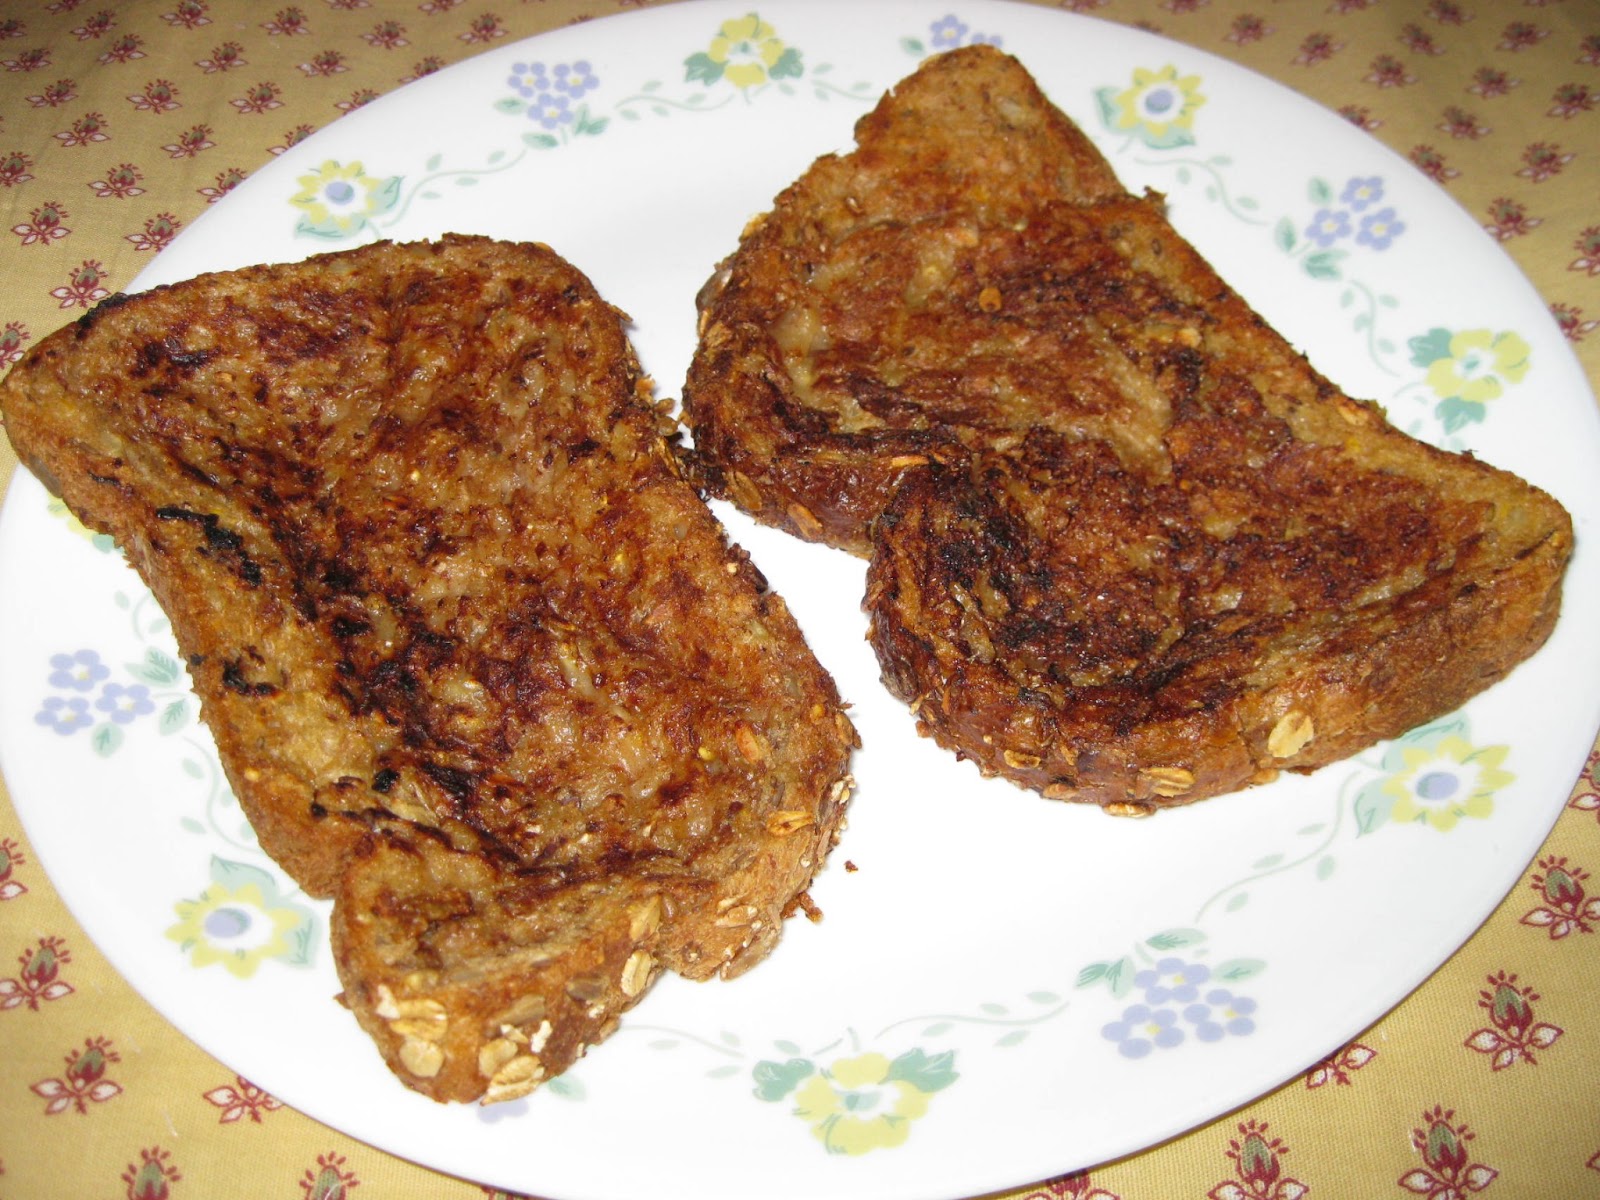
The finished product, the next morning:

Tasty Leftovers
I didn't get a chance to snap a photo fresh out of the oven, since hubby was ready to eat as soon as he got in. This is one enchilada, cut in half to fit the container.

It tasted great! We both agreed it could have used a bit more chili powder, or maybe a dash of cumin or some other spice, because it still tasted a bit blander than usual, thanks to our dulled tastebuds. A few squirts or sriracha sauce helped. Made exactly the same way next time it'll be plenty spicy for us.


Tuesday, January 8, 2013

Mighty Muffin Update

The papers came off!

What we didn't eat the first day got wrapped in cellophane and left on the kitchen table. The next morning when my husband went to eat one for breakfast he showed me that the paper came right off. The muffin was a bit soggy and so was the paper, but on the plate was the paper and only the paper with not one crumb of muffin stuck to it. He immediately took the papers off the remaining 3 muffins and rewrapped them.

It was a busy day and neither of us felt like a snack that evening and forgot about the muffins until the next morning.

My husband took the wrap off the plate and Whoa! We should have refrigerated these things, because the fruit in the muffins fermented and it smelled like wine-infused muffins under that wrap! He spent a good 3 minutes debating whether or not to still eat them before tossing them out.

So now two things to remember the next time I make them:

Don't use cupcake papers

Refrigerate or freeze them at the end of the day they're made

Saturday, January 5, 2013

Engine 2 Semi-Disaster - Mighty Muffins

For many years when I made muffins I had to forgo the use of those cupcake liners, because fat-free baking and paper don't get along. I usually sprayed my muffin pan or, for a short while, used those single-sized silicone cups.

Well, Dr. McDougall, among others in the field, say NO OILS, not even to spray the baking pan (although Mary McDougall does say to do it in some of her earlier recipes), and those silicone cups  (no matter what brand I used or how well they were scrubbed) would turn tacky to the touch after a few months, so what's a person to do? Non-stick pans are a thought, but even they say to spray/oil them in the directions that come with them, and besides, they still stick.

I usually go against the gurus and spray my non-stick muffin pan and use parchment paper for other baking purposes and it's worked out well all these decades. There's no McDougall Police coming around to arrest me.

The recipe for Mighty Muffins in the Engine 2 book said to pour the batter into sprayed muffin tins. Rip already uses some ingredients his father, the doctor, says to avoid so I just chuckled when I read this and turned the page, since I never had 3 cups of oat bran or 6 ripe bananas sitting around. Then the recipe appeared on the Engine 2 web site and the directions were changed - it now says to pour into lined muffin tins. I just got a fresh delivery from Amazon of a case of Bob's Red Mill oat bran, and even though it's the end of the week still had the required 6 bananas nice and ripe sitting in the kitchen, so I could finally make them! I looked the recipe over again to double check needed equipment and ingredients. Hmm, it does say to use the paper liner cups, so I guess this isn't one of those recipes where, under the cover of darkness in the oven, some alchemy happens that causes the dough and cupcake paper to merge molecules and become one, unseparable forever, even after a nuclear holocaust.

A word of caution - it still is.

No matter how hard we tried, even with my husband chewing the paper, he couldn't get the outer layer of the muffin off of it. 

This morning I went and double-checked the recipe on-line and sure enough, the muffins in the photo do NOT have cupcake papers on them. I've been shennaniganed

So people, if you want to be able to eat ALL of these otherwise delicious muffins, PLEASE either spray your pan or use those silicone muffin cups, if you still have them laying around and they aren't tacky.

Here's a photo of the batter freshly poured into the muffin pan with papers. The recipe said it makes 6 large sized muffins, and even with these filled almost to the top of the papers I still had enough dough left over for a seventh, so I put a jumbo sized paper liner into a little Pyrex custard cup and poured it into there.


A word about the liners. I looked for months around my area and any mall I went to looking for the size that would fit my large muffin tins, and nobody had them. I finally found some on Amazon at this link. Amazon has others that had ridiculous prices, like $45 for 40 papers, and people were actually buying them at that price because they, too, were desperate and couldn't find them where they lived. So they're plain white papers, not those cute ones with all sorts of graphics, like butterflies or Stars and Bars or fractals, but they are what is needed if I ever want to make cupcakes using that jumbo muffin pan.

And the finished product. As you can see, these didn't rise at all.


Photo taken by the Kid using the iPod he got for Christmas


The first thing you notice is the weight of these things. Each muffin is heavy! One of these bad boys will probably fill you for 6 to 8 hours for a hearty breakfast or snack. My husband and I each ate half of one (Well, what was left of one after taking the paper off) and knew there was no way either of us big eaters could ever finish a whole one by ourselves. The muffin top was a bit crusty and hard, but not inedible. They look nothing like the photo on the recipe's web page, as you can see. My baking powder is fresh, so I don't know if it's the heaviness of the fruit or what that makes them so different in appearance. 

But all kidding and complaints aside, they do taste good. This time I made them with frozen blueberries, skipped the walnuts because my husband is allergic to them and used 2 tablespoons of a combination of flax seed and slivered almonds instead. I used honey for the sweetener but next time I may use plain old sugar.

And you can bet your bippy that next time I make these, I'm not using paper liners but will spray my jumbo muffin pan!

Thursday, January 3, 2013

Looks Disgusting but Oh! So Delicious! Creamy Broccoli Lentil Soup

Dr. Fuhrman's Creamy Broccoli Lentil Soup, McDougallized

One of the perks of being a paying member to Dr. Fuhrman's web site is the access to all those delicious recipes. 


This is one of them.  

I read on the forums once that they can be shared with non-members, as long as credit is given to the Dr. Fuhrman web site and/or the originator of the recipe. No name was associated with this one so I can't give proper credit. It may have been Dr. Fuhrman or his wife Lisa, or it may have been a forum member - I have no idea.

I'll post the recipe as written, then mention my changes after it:

Creamy Broccoli Lentil Soup
www.DrFuhrman.com

Serves: 8
Preparation Time: 45 minutes

Ingredients:
8 cups water
2 cups carrot juice, fresh or bottled
1 pound dried lentils
2 pounds plum tomatoes, chopped
4 cups broccoli, chopped
2 onions, chopped
3 celery stalks, chopped
2 carrots, chopped
6 cloves garlic, minced
3 small zucchini, chopped
1 tablespoon dried oregano
1 1/2 teaspoons dried basil
1 teaspoon ground coriander
1 teaspoon ground cumin
1 teaspoon dried thyme
1 yam, peeled and chopped
3 tablespoons Dr. Fuhrman's Riesling Raisin Vinegar or balsamic vinegar
1/2 cup raw cashews or 1/4 cup raw cashew butter

Instructions:
Place all ingredients except yam, vinegar and cashews in a large soup pot. Bring to a simmer and cook for 45 minutes. Add yam and simmer for an additional 15 minutes or until lentils and vegetables are tender.
Remove from heat. Add vinegar.
Remove 2 cups or more of soup and puree with the cashews in a food processor or high powered blender. Stir back into soup.


I used a can of whole plum tomatoes instead of fresh. Jeff Novick taught me to always have some on hand.

Ditto frozen broccoli. I used a full one-pound bag of frozen chopped broccoli instead of fresh.

But I didn't have any zucchini on hand so skipped it. Maybe next time, but you can be sure I'll use frozen instead of fresh.

Again, a Jeff Novick hint with the sweet potatoes. I have a few already baked in the refrigerator so used one of those instead of peeling and cutting a raw one.

My balsamic vinegar was outdated by a year - Yikes! - but I do have a bottle of fig vinegar and used that instead.

I skipped the cashews entirely.

Instead of taking just 2 or so cups of soup to blend, I just took an immersion blender to the whole pot. If I tossed it in the Ninja for a few minutes it probably would have been smoother, but it was worth it not to have to clean that thing and accept the few little grit-sized pieces of vegetables and lentils in the soup.

It says it makes 8 servings. These are nice hearty serving sizes, not tiny one-cup ones. This is definitely a family-sized recipe, or one of those "make Sunday and eat every day for a week" recipes.

And why do I say it's disgusting in the blog post title? Well, when my husband first saw it in the bowls he said it looks like it'll look the same going in as it will coming out. So it's not an especially good looking soup, but it does taste delicious! Another keeper for this family, for sure.